REVOLUTION HAIRCARE SALICYLIC ACID CLARIFYING RANGE REVIEW (BLOGTOBER – DAY EIGHT)

Post contains gifted products. All views are my own.

Did you know I’m actually a hair stylist by trade? I haven’t worked in the industry for a very long time but a piece heart will always belong to it.

I’ve spoken before about the power of the right cut and finding the correct person to help you achieve it (shout out to my stylist Sian at Sian Hair & Beauty because she is the best in the biz!).

Part of my journey has always been finding products that work for me (and that changes depending on the season just like your skincare!).

I’ve been trialling the Salicylic Acid Clarifying Range by Revolution Haircare and it seems to be working wonders on my super oily hair and scalp! It genuinely feels like a treat to use and so much more luxurious than it’s price tag would lead you to believe.

Revolution Haircare Salicylic Acid Clarifying Shampoo for Oily Hair
£9

Revolution Haircare Salicylic Acid Clarifying Conditioner for Oily Hair
£9

Revolution Haircare Salicylic Acid Clarifying Scalp Serum for Oily Scalp
£8

If you really want to elevate your routine from basic to something truly epic then you could also pick up a couple of treats that work beautifully alongside the range.

Revolution Haircare Stimulating Scalp Massager
£5

Revolution Haircare Microfibre Hair Wrap (2 Pack)
£8

I’m slowly training my hair and scalp to go longer in between washes without feeling lank/greasy and whilst it’s a process I can see the difference already. I’m now getting a whole extra day of fresh, luscious hair and I am so living for it.

What are your hair heroes and do you have any tips for someone who may be struggling with achieving their dream style?

BLOGTOBER X BLOGR CHALLENGE 2021 WEEK 1 – KELLY’S ADVICE ON TACKLING ONLINE HATE (BLOGTOBER – DAY SEVEN)

Hello my lovelies!

I’ve never tackled a blog post like this before so please bear with me, it may all come tumbling out and make absolutely no sense!

I’ll admit I’ve been very lucky and up until last week had never experienced any kind of online hate or trolling.

I remained blissfully ignorant as to how much your confidence can be obliterated in no time at all with a handful of comments from strangers.

Having recently put together a piece of content I was incredibly proud of (and something the brand themselves had been very complimentary of, enough so that they asked to feature it in an ad campaign) I was horrified to learn that my appearance was the subject of many negative discussions.

When I first came across the comments my initial reaction was one of confusion.

I don’t know these people. What have I done to deserve such an attack?

It’s hard to comprehend the mentality of trolls when you would never dream of being so hurtful to anyone. I cried and I’m not ashamed or embarrassed to admit that. Putting your heart and soul into something only for others to try and tear you down is sickening.

So what have I learned and how can help someone else who may be experiencing the same thing for the first time?

The answer is, I’m not completely sure to be honest. Personally in the days following my own experience I managed to find humour in the comments. At the sheer silliness of the things people were saying and the fact that their opinions didn’t matter in the grand scheme of my life.

I refuse to let anyone take away something I have the righty to be so proud of. I will never again let another person make me feel small or insignificant.

My biggest piece of advice though is to never isolate yourself if you’re feeling attacked because it will allow those comments to burrow and fester. To implant themselves into your subconscious. Speak to your friends. Speak to your family. Let them pick you up, support you and comfort you. Listen to their kind words and believe them but above all believe in yourself.

You’re amazing. Don’t let anyone, let alone an insecure stranger make you believe differently.

#PIXIPRETTIES COLLECTION REVIEW (BLOGTOBER – DAY SIX)

Post contains gifted products. All views are my own.

The Pixi Pretties are back again and absolutely stealing the show with a quad of palettes to cover all bases.

Cream Rouge Palette Cream Colour Palette
x Louise Roe £18

Four stunning palettes curated by a team of world renowned beauty content creators (our resident #pixipretties) to sate the appetite of even the fussiest of customers.

The collection carefully walks the line between a natural radiance or achieving full blown glamour and I am so here for it.

Mind Your Own Glow Radiance Palette
x Denise Sanchez £16.00

Arguably the most versatile part of the collection for me is the Cream Rouge Palette Cream Colour Palette by Louise Roe. With such a fantastic shade selection you’ve got your lips, cheeks and eyes covered (if cream products are your bad obviously). I feel like it’s going to be the perfect transitional tool to take you from season to season and day to night.

Shapeshifter Palette Contour Palette
x Promise Tamang £12

If you’re looking for versatile products that don’t discriminate (each palette is designed to work beautifully with a variety of skin tones) then these beauties really are worth the investment.

Tones & Textures Eyeshadow Palette
x Tina Yong £22

I’m so excited to mix and match these stunning palettes (which will work beautifully across the year through all seasons).

You can always count on Pixi Beauty to deliver!

KELLY’S GUIDE TO ROCKING A STATEMENT LIP THIS AUTUMN (BLOGTOBER – DAY FIVE)

There is nothing better than finishing off a makeup look with your favourite dramatic lipstick. It can instantly elevate your mood and is my absolute favourite confidence booster.

I understand that it can seem really intimidating, especially if you consider yourself a makeup novice but I promise you that once you’ve perfected the art of a statement lip, you’ll never look back!

Keeping it simple…

There really are no rules when it comes to your preferred style but the best advice I could give (especially if you’re new!) is to keep everything else super simple. You don’t need to put in tons of work else wear when going for a bold lip choice. A well applied base and a slick of mascara or some lashes if you prefer is going to make your chosen shade the focal point of your makeup look (which is exactly what we want!).

Choosing a shade…

If you’re like me then you’ll know ‘your colour’ straight away (a Hollywood red is always a winner!) but if not that’s ok too. Experimenting is part of the fun! To begin with I suggest choosing a shade that might feel ‘out there’ but seems like a logical next step to the things already in your wardrobe. Complimentary colours will elevate your whole look and make experience feel so much more relaxed and doable.

Thirsty? Moi?

Hydration is key. Smooth, soft lips will make all the difference to the application and longevity of your new confidence maker. Incorporate a lip balm into your skincare routine if you don’t already use one. I also recommend using a scrub followed by a lip mask (the Bubu #youpucker Lip Pumping Mask is my fav!) once a week. The difference in your pout will speak for itself.

Above all else…

Just be brave! You’ve got this. Today you’ll tackle a new lipstick and tomorrow you’ll take on the world!

PIXI BEAUTY REMEDY MASK COLLECTION REVIEW (BLOGTOBER – DAY FOUR)

Post contains gifted products. All views are my own.

If ever there was a time I needed a pick me up it’s now!

I’ve just started university as a mature student and my head is absolutely fried! Pair that with tackling my children’s never ending school commitments/general life and that’s pretty much just a recipe for stressed out skin.

Thankfully Pixi Beauty we’re kind enough to send me over their Remedy Mask Collection so fingers crossed I’ll be back to myself in no time!

Pixi Beauty Vitamin-C Remedy Mask.

Packed to the gills with nutrients and botanicals to give your skin all kinds of goodness these lightweight jelly masks have been such a welcome addition to my skincare collection.

With three gorgeous masks to choose from…

Vitamin-C Remedy Mask – a brightening, toning jelly packed with nutrients and botanicals to help refresh and revitalise your skin. Blend of Citrus, Green Tea, Ferulic Acid and Ginseng energises, brightens and hydrates.

Milky Remedy Mask – a soothing, toning jelly packed with nutrients and botanicals to help revive your skin. Blend of Coconut, Oat, Chamomile and Sea Buckthorn calm, soothe and hydrate.

Rose Remedy Mask – a nourishing, toning jelly packed with nutrients and botanicals to help refresh and deeply nourish your skin. Blend of Rose, Argan Oil, Cica and Turmeric refreshes, nourishes and hydrates.

…it’ll be easy to find one to suit every mood or concern.

Pixi Beauty Vitamin-C Remedy Mask.

Let’s not forget these are the ideal trio to multi mask with. If you are blessed/cursed with combination skin then you’ll LOVE working with these beauties (which are sooo simple to use by the way!

• Use in the AM & PM, or as needed.
• Step 1: Apply a thick, even layer to clean skin, avoiding eye area.
• Step 2: Leave on for 10 minutes.
• Step 3: Rinse or tissue off.

pixibeauty.co.uk

Each 300ml tub costs £20 which is at the priced end of what I’d be willing to pay for a mask (your girl has children to feed, clothe and entertain!) but will last you as the product is definitely in the ‘a little goes a long way’ category.

Despite my cheap skate ways I can honestly say the masks are beautiful, smell divine and left my skin feeling super smooth, taut and revitalised ready for another day just being a boss.

SPECTRUM COLLECTIONS CORE COSMETICS COLLECTION REVIEW (BLOGTOBER – DAY THREE)

GLOW-GETTER (noun)

A driven individual who strives to achieve her goals while attaining a beautiful glow both inside and out.

Summer may be over but that doesn’t mean you have to leave that coveted glow behind. The Core Cosmetics Collection is a must have if you’re after that glowing goddess lit from within kind of vibe (and who bloody isn’t!).

Never have I ever in all my life seen such an aesthetically pleasing collection.

I feel like this collection might be the very definition of what I feel on the inside on my best days. It just feels all things ‘good’ you know?

Spectrum Collections Uplifted Pinch Pot.

I picked up the…

Meggan Grubb’s Limited Edition Peachy Glow Beauty Box which contains

The set retails for just £44.99 (but is worth a whopping £63.96).

I also added the Rise Bronzer £24.99 so I could give my thoughts on the complete collection.

Spectrum Collections Rise Bronzer.

It’s an absolute must have and I’m so excited to collect the rest of the Pinch Pot shades!!!

The Spectrum Collection Core Cosmetics Collection is a thing of beauty. So elegant yet contemporary which I think is a really hard balance to strike with Sophie and Hannah have done it with complete ease!

Spectrum Collections Rise Bronzer and Glowful Mist.

PIXI BEAUTY ON-THE-GLOW BLUSH TINTED MOISTURE STICKS REVIEW (BLOGTOBER – DAY TWO)

Post contains gifted products. All views are my own.

I will admit to never having been anything but a powder blush kinda gal my whole life but when these beauts landed at my door I feel like a door was opened that I can not and will not ever close.

Formulated with Ginseng, Aloe Vera and a unique mix of Fruit Extracts, this tinted balm provides a hint of natural colour while hydrating and conditioning skin.

pixibeauty.co.uk

Packed with vitamins and antioxidants as well as intense (but easily blended) colour pay off the Pixi Beauty On-The-Glow Blush Tinted Moisture Sticks have become a staple in my everyday routine.

Available on three shades…

• Juicy (a gorgeous pop of orange)
• Fleur (a subtle rosey flush)
• Ruby (a vibrant raspberry)

…and costing £18 (which may seem steep I guess but a little goes a long way!).

Completely cruelty free and multipurpose which make things a whole lot easier in the morning when you’re in a mad dash to get out of the door. Just swipe across the cheeks and finish with a quick dab on your lips and your good to go with a beautifully pulled together makeup look.

Below you’ll find guidance straight from the Pixi Beauty website on how to apply your new favourite blush!

• Step 1: Twist base to wind up or down.
• Step 2: Swipe gently onto skin.
• Step 3: Blend with fingertips.
(Although I actually prefer to use a stippling brush.)
• Step 4: Close lid after each use.

I’ve mentioned before (only a couple hundred times) how oily I am and I think that’s why I have previous steered clear of anyone but your big standard blush. I was worried initially that the formula would sit horribly on my sometimes hard to work with skin but honestly those fears were so unwarranted.

They blend beautifully and have wonderful longevity. The thing I find most fascinating is that you can apply on top of your setting powder and they still look dewy without disturbing anything else underneath.

Couldn’t rate these more highly!

KELLY’S TOP 5 LIPLINER, TIPS, TRICKS & HACKS (BLOGTOBER – DAY ONE)

The right lipstick can completely change not only your appearance but your whole mood. You can find a shade for every skin tone, occasion and season but with that you’re going to need the perfect lipliner (and application!) because without the finishing touches life is just a bit bland, isn’t it?

Here are my top 5 tips for how to get your liner to work for you with minimal effort (because I’m an enthusiast, not an MUA and I like life to be nice and simple)!

1. Switch things up!

First up is my absolute go to, holy grail of all liner tips. Apply your lipstick first and finish with a liner. I know it seems quite contradictory to what you’re trying to achieve but trust me! It’s fool proof and will make the world of difference to your perfect pout. You’ll have already done the work with your initial application which will leave you with the fun part of defining your best features (so all of them basically because YOU ARE A SNACK!) as well as simultaneously cleaning up the edges. You’re also onto a winner when your lipstick starts fading because you won’t be left with any unflattering rings or lines around your lips.

2. Prep.

Exfoliate, exfoliate, exfoliate! Flaky lips? We don’t know her!

The last thing you’ll want is for your liner to cling to dry patches and dead skin. Firstly it’s not going to feel very nice and secondly they’re just going to be so much harder to work with. A sugar scrub is a quick and easy way to maintain soft, smooth lips with minimal effort and really will make all the difference.

I’m sure it goes without saying that dry lips should not be a feature here! However, as much as a slick of balm is going to help you achieve a much more kissable pout and help to prevent a liner dehydrating your lips it can also make things a little more complicated when trying to control your liner. I like to prep with a balm during my skincare routine so that by the time you’re ready to apply your lipstick everything has dried down enough to be able to retain some control.

3. Contrast can be key!

The power of a good lipstick and liner duo is that the possibilities are endless and it really is so easy to completely change the appearance/shape of your lips with a few little switches. By using contrasting shades (a darker liner against a lighter lippy) you’ll easily be able to fake bigger, plumper lips and I’m all about that life.

4. Out with the new and in with the well, nearly new…

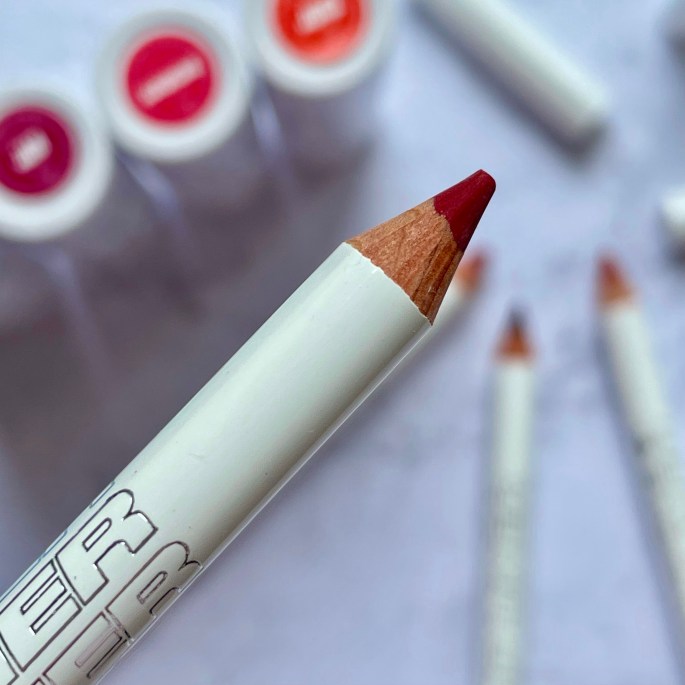
As silly as this is going to sound a brand new liner can be your worst enemy if you’re a novice (or messy like me!). I’m not saying we want a blunt tip but a little bit of wear and tear makes a huge difference. You can also flatten the tip of your liner by warming it in between your hands before squeezing gently. This will be so much easier to work with. Trust me!

Whilst we’re on the subject of what makes a good liner application I also wanted to mention angles. The way you hold your liner is going to make such a huge difference to the finish. The most commonly recommended method would be to hold your line at a 45-degree angle (now I can only speak for myself when I said ‘erm, what?’ then again I was always rubbish at maths.) but to be honest I think really it’s something that just needs a bit of tweaking. Trial and error, you know!

5. Slay all day.

If staying power is what you’re after then this is one for you. Fill in the entire lip with the liner to create a base for your lipstick or gloss. It can be drying but with the correct prep you’ll achieve the kind of longevity that seems suspiciously close to magic.

…and that’s it! I hope you’ve been able to pick up a few tips and tricks or at least feel a bit more confident when tackling a statement lip now!